Hey there! We’re excited to share how to use a mini DV player with your Canon ca920 camera. These tools have changed the game in making videos and pictures. If you learn to use the mini DV player, you’ll take your camera skills up a notch. We’ll show you how to make your videos look top-notch. So, grab your camera and let’s get started!
How to Use a Mini DV Player on Canon ca920 Camera
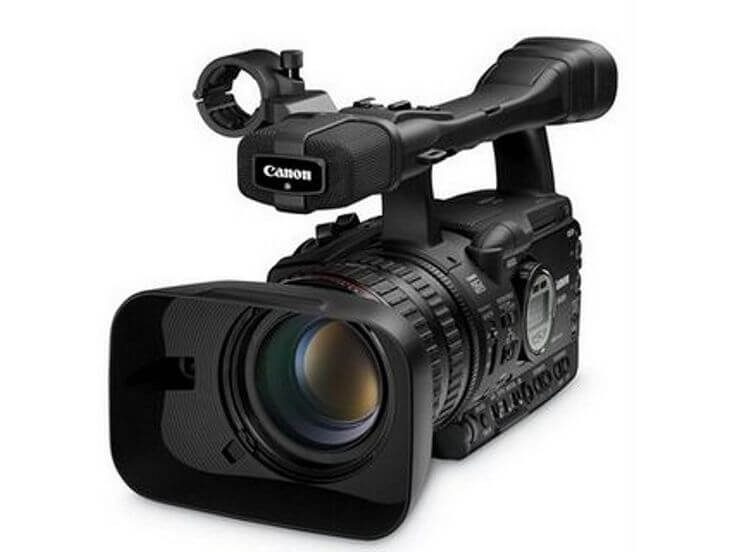
Meet the Canon ca920 Camera
We’ve got a star here: the Canon ca920 camera. It’s a champ for recording videos with its sharp images and easy buttons. It’s special ’cause it works with mini DV tapes—those small tapes from back in the day. So, you get the cool old-school vibe with all the new tech perks.
Using the Mini DV Player with Your Camera
Here’s how to get your mini DV player rolling with the Canon ca920:
- Turn off your camera and pop in the mini DV tape.
- Switch on the camera and hit the VCR or Play mode.
- Use the play and rewind buttons to watch your tape. They’re easy to find.
- Got a bigger screen? Hook up the camera with cables to your TV and enjoy.
- To save your video somewhere else, just connect to a recorder and press play on your camera.
Each button on your camera helps you control your tape—like playing, stopping, and skipping parts.

Top Tips for Your Mini DV Player
Want to make the most of your mini DV player with the Canon ca920? Check this out:
- Make sure your camera’s battery is full to avoid cutoffs.
- Keep the player clean with a head cleaner tape for the best sound and picture.
- Before you shoot, tweak your camera’s settings to match the scene for a great look.
- When moving videos to another gadget, double-check your plugs and press the right buttons.
Stick to these steps and tips, and you’ll be a mini DV whiz with your Canon ca920 in no time!
How to Turn Your Mini DV Tapes into Digital Videos
Why Make Your Mini DV Digital?
Turning your Mini DV tapes into digital videos keeps your memories safe and sound. When you change them to digital, you can watch them on phones and computers, and they won\’t get bad over time like tapes can. Plus, digital videos look clearer and are a snap to share with friends and family.
Steps to Go Digital
Let’s get those old tapes into the digital world. You’ll need a Mini DV player or camcorder, a computer, and some simple software. Here’s what we do:
- Connect the Mini DV player to your computer with a FireWire cable.
- Switch your player to play mode.
- Open video software on your computer. You can use Windows Movie Maker or iMovie.
- Hit the “Record” button in the software to start copying the video.
- Save the video on your computer.
Smart Tips for a Smooth Change
Keep it simple and avoid hiccups with these quick tips:
- Clean the player’s heads to keep the picture clear.
- Make sure your computer has room for the videos.
- Don’t do other computer tasks while you’re transferring.
- If the video is really long, break it up into parts.
- Once you’ve got your videos on the computer, make extra copies to keep them safe.
By following these steps, you’ll be sure to keep your videos looking great for years to come. It’s like turning your old tapes into a digital treasure chest!
How can I View Mini DV Tapes?
Got Mini DV tapes? Great! You can watch them in a few different ways. Let’s dive in and show you how it’s done.
Different methods of viewing Mini DV tapes
You can watch your Mini DV tapes with:
- MiniDV Camcorder: Pop the tape in and press play.
- Converter Box: This gadget hooks up to your TV and lets you watch your tapes.
- Mini DV Player: It’s like a VCR, but for Mini DV tapes.
- Computer: Connect your camcorder to a computer and watch your videos there.
Steps to view Mini DV tapes on Canon ca920 camera
Watching tapes on your Canon ca920 camera is easy. Just follow these steps:
- Make sure your camera’s battery is full or plug it in.
- Put the Mini DV tape into your camera.
- Turn the dial to VCR or Playback mode.
- If you want to watch on your TV, connect the camera with the cable that fits.
- Press the play button on your camera to start watching.
Challenges that may arise while viewing Mini DV tapes and how to overcome them
Sometimes things go wrong, but don’t worry! Here’s what you can do:
- Blurry Video: If the picture looks fuzzy, a cleaning tape might clear it up.
- Won’t Play: Double-check the tape and mode settings. If it still won’t play, the tape could be broken.
- No Sound: Make sure your volume is turned up and the cables are all the way in.
With these tips, you’ll be watching your Mini DV tapes in no time. Pull out your Canon ca920 and take a walk down memory lane!
How do I Transfer Data from my MiniDV to my Computer?
Importance of transferring data from MiniDV to computer
Transferring data from MiniDV to a computer is a game-changer. It opens up a world where you can store your precious memories indefinitely, without the fear of tape degradation. Plus, you get the chance to edit your videos to perfection, share them easily with friends and family, or upload them to the internet. Think of it as giving a new life to your old tapes, ensuring they continue to tell your story for years to come.
Step by step guide on how to transfer data from MiniDV to computer
We’ve got a straightforward process to help you transfer your MiniDV content to your computer:
- First, you’ll need a Firewire cable (also known as IEEE 1394) to connect your Canon ca920 camera or MiniDV player to your computer.
- Turn your Canon ca920 camera or MiniDV player to VCR mode.
- Plug one end of the Firewire cable into your camera and the other end into the Firewire port on your computer.
- Once connected, power on your camera.
- If you’re on Windows, a capture window should pop up. If not, you can use software like Windows Movie Maker or Adobe Premiere Elements. For Mac users, iMovie is a great choice.
- In the video capture software, look for an option to ‘capture’ or ‘import’ video, and then follow the on-screen instructions.
- Play the MiniDV tape in your camera and start the capture process in the software. This will begin transferring the video content to your computer.
- Once the transfer is complete, make sure to save your file in your desired location.
And there you have it, your MiniDV content is now safely stored on your computer!
Solutions to common problems encountered during data transfer
Sometimes, things don’t go as smoothly as planned. Here’s how to tackle some common roadblocks:
- If your computer doesn’t recognize your camera, make sure it’s set to the correct mode (VCR or Play) and that the Firewire cable is securely connected.
- Not all computers have a Firewire port. You may need to purchase a Firewire card or use a Firewire-to-USB converter.
- Ensure you have the necessary software drivers installed for your camera. These can usually be found on the manufacturer’s website.
- Video not capturing correctly? Try resetting your camera and computer, and then attempt the capture process again.
- If you’re experiencing dropped frames during the transfer, make sure no other heavy applications are running on your computer that could be using up your system’s resources.
With these steps and solutions, transferring MiniDV tapes to your computer should be a breeze. Remember, patience is key—some issues may take a bit of troubleshooting, but the end result is well worth the effort.
Conclusion
We’ve covered a lot in this guide on using your mini DV player with the Canon ca920 camera. We hope you now feel confident to record, view, and share your videos. Remember, mastering the mini DV player on your Canon camera can really improve your video quality. It’s worth the effort to learn!
Don’t forget the steps to convert your Mini DV tapes to digital. This keeps your memories safe and makes them easy to watch anytime. Transferring data from your MiniDV to your computer is also key. It saves space and lets you edit your videos to make them even better.
Using a MiniDV camcorder might seem tricky at first, but follow our guide and you’ll be a pro in no time. With our tips, you can get the most out of your MiniDV camcorder.
We’re always here to help if you hit a snag with your mini DV player or Canon ca920 camera. Just give our tips a try, and you’ll be on your way to capturing and sharing great videos. Keep filming and enjoy the digital world!